
Windows has used the familiar white mouse cursor by default for decades. And while there’s nothing wrong with this, have you ever wished you could change your mouse cursor? Maybe you could work more efficiently with something that’s easier to see, or perhaps you want to customize the cursor just for something new.
Thankfully, it’s pretty simple to set a new mouse cursor in Windows. Here’s how to do it.
Accessing the Mouse Pointer Options in Windows
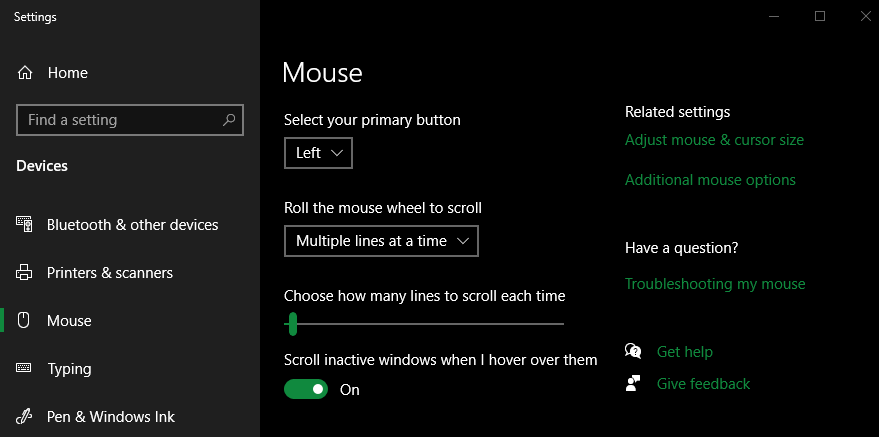
Despite the new Settings app holding many useful options in Windows 10, the panel for changing your mouse cursor is still found in the older Control Panel interface. To access it quickly, open Settings > Devices and click Mouse on the left sidebar. From there, choose Additional mouse options on the right under Related settings.
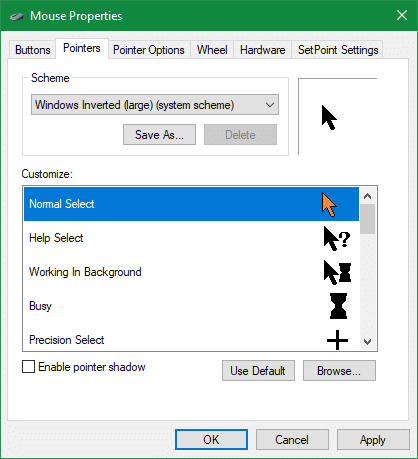
This will open a new Mouse Properties dialog box from the Control Panel. The Pointers tab at the top is where you’ll find the options to change your mouse cursor.
Choose From the Default Windows Cursors
To select from one of the built-in Windows cursor sets, click the dropdown box under Scheme. Windows 10 starts you with Windows Default (system scheme, but there are a few other options here:
- Windows Black is a simple black cursor, similar to the default option on a Mac. However, it’s pretty blocky, so it resembles a cursor you’d see on older systems, like Windows XP.
- Windows Standard is very similar to Windows Default, but it uses older icons like Windows Black.
- Windows Inverted is the most interesting option. While it appears black in the menu, this one actually changes colors depending on what the cursor is on top of. So if your mouse is on a black surface, it will turn white.
- Magnified is essentially just a larger cursor.
Each of these options (except Magnifier) comes in Large and Extra Large sizes. These are handy if you just want a larger cursor so you don’t lose track of it.
How to Install New Mouse Cursors for Windows
If you don’t like the limited built-in cursor options, it’s easy to find lots of cursor icons online. Artists create sets of cursors and offer them (usually for free) on sites like DeviantArt.
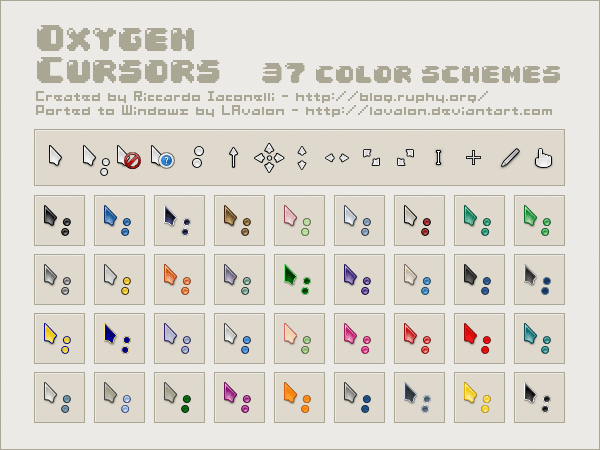
We’ll use the Oxygen Cursors from DeviantArt as an example. This is a great pack because it’s easy to install and contains 37 color schemes. If you don’t care for it, check out the Open Cursor Library for many more choices.
After downloading a cursor pack, you’ll probably find that it comes in ZIP, 7Z, RAR, or another compressed format. If it’s a ZIP file, you can right-click and choose Extract all. Windows can’t unzip other formats on its own, though, so you can install the free 7-Zip to easily extract them.
Once you extract the folder, open it and you’ll see several files inside. In the case of Oxygen Cursors, there’s a separate folder for each color. If your pack only has one theme, you’ll see its files right inside. These should end in either CUR or ANI. CUR files are static images used for cursors, while ANI files are animated cursors.
Installing the Cursor Packs
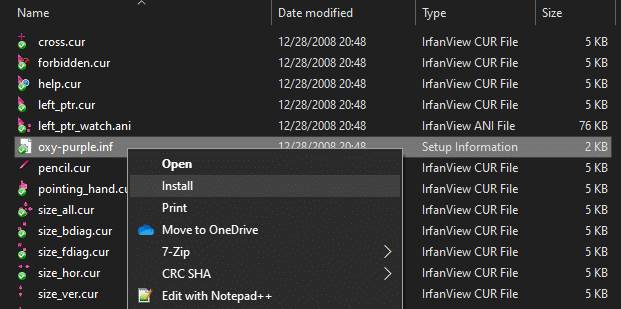
Many cursor packs for Windows include an installer file, which ends in INF. Oxygen Cursors uses oxy-[color].inf, but it might be called install.inf or similar for your pack. Right-click on this and choose Install.
Upon doing this, you’ll see a UAC prompt asking for your permission to proceed. This is because INF files can modify protected files, which is necessary to install cursors in this case. After you approve the prompt, you’ll see a brief dialog box as Windows installs it.
Now you have the cursor set installed. Repeat these steps if you downloaded multiple packs and want to install more.
How to Switch to Your New Cursors
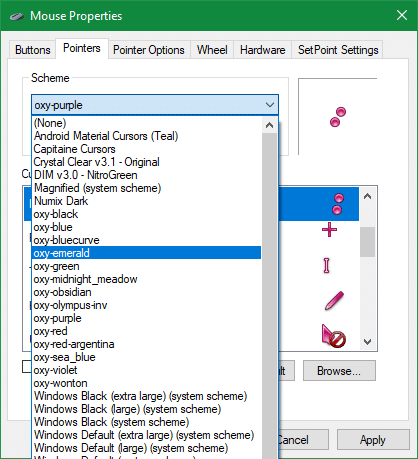
Once you’ve installed the new icons, you just need to swap to them. Head back to the Mouse Properties menu as discussed above. Under Scheme, expand the dropdown box and you should see your new cursor set(s) available. Pick one and you can preview how individual icons look in the list below.
Click Apply to start using your new cursors and OK when you’re done. If you ever want to change to a different set or go back to the default, just repeat these steps and pick something different.
If Your Cursor Pack Didn’t Include an INF File
The INF file automatically installs all the icon files, which is convenient. However, some cursor packs don’t include this. If that’s the case, you’ll need to manually assign the correct cursor icon to each action on the Mouse Properties menu.
Make your way through the Customize list, which contains the various icons Windows uses for your cursor (Busy, Vertical Resize, etc.). To change each one, select it and hit the Browse button. Browse to the location where you extracted your cursor files earlier and select the correct one.
![]()
Hopefully, it’s clear which cursor goes with what action based on their names. If not, you may have to experiment a bit to find the correct ones. Note that the Location Select and Person Select cursor types are new (and rare) in Windows 10, and thus many cursor packs don’t include them. A “full” cursor pack typically has 15 icons.
Once you’ve set all the cursors manually, select Save As to create a new cursor scheme. Give it a name, and you’ll see it appear in the Scheme dropdown box from now on. Hit Apply and OK to start using your new cursors.
Personalize Your Computer With New Cursors
It’s pretty straightforward to use fresh cursor icons in Windows. Most of the time, you can easily install a whole pack using convenient INF files. If you’re feeling particularly creative, you could even create your own image files.
For your safety, keep in mind that you should only download cursors from trusted resources. Well-known sites like those mentioned above should be fine, but it’s not a good idea to download cursors from ads or unfamiliar pages. If you see an EXE or MSI file in a cursor pack, or a site wants you to install some software to access cursors, you should avoid it.
For more Windows customization, check out how to master the Windows 10 Start menu.