
App notifications seem like a great idea, but they can get out of control quickly. When your iPhone is constantly chirping to alert you of updates, you can’t focus on what you’re trying to get done.
Thankfully, iOS has lots of options to help you keep iPhone notifications under control. Let’s look at some of the most important options for taming iPhone alerts.
Manage Notifications by App
First, open the Settings app on your iPhone and head to the Notifications entry. This is the main page for managing how app notifications behave.
You’ll see a list of apps installed on your device that send notifications. Tap one to review and change its style of notification delivery.
Disable All Notifications or Change Display Options
At the top of the app’s page, you can turn off the Allow Notifications slider to completely disable notifications, if desired. This is a nuclear solution, but is useful if you don’t care about any notifications the app sends. Just be careful when using this for apps where you might need timely updates.
Under the Alerts section, you can choose where notifications appear on your iPhone. The options are:
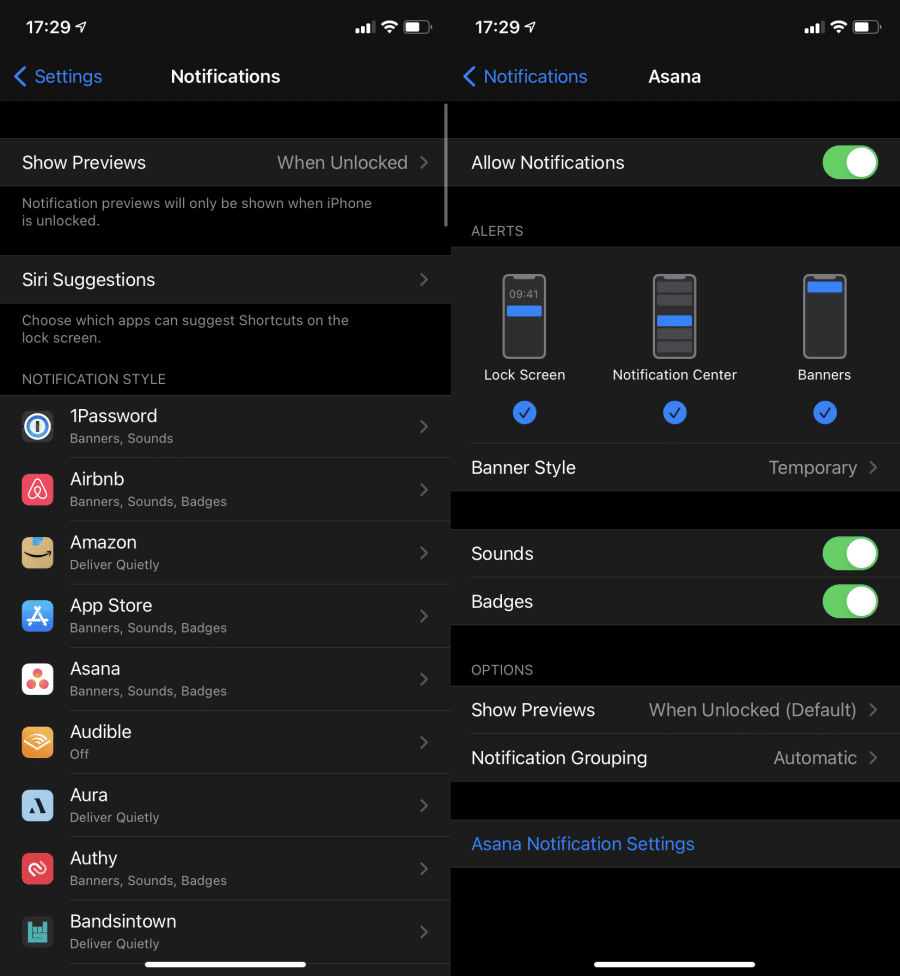
- Lock Screen: The notification will appear on the Lock screen, which is the screen before you scan your fingerprint/face or type your PIN. Typically, it will only appear if the alert happens when your phone is locked, and will clear after you unlock your phone once.
- Notification Center: The notification will stay in your Notification Center, which you can access by swiping down from the center-top of the screen anywhere on your iPhone. You can also access the Notification Center by swiping up from the middle of the Lock screen.
- Banners: With this enabled, you’ll see a small popup appear at the top of your screen if a notification arrives while you’re using your device.
With Banners enabled, you can set the Banner Style to Temporary or Persistent. Temporary will clear the bubble after a few moments, while Persistent keeps it there until you swipe it away or open it.
Sounds, Badges, and Grouping
Continuing on the list, you can turn off Sounds if you don’t want notifications to make any noise. Some apps also let you customize the sound for alerts, if you wish.
Disabling the Badges slider will prevent the app from showing the red dot with the current number of notifications on your Home screen. Some apps are aggressive with these , so turning this off can help prevent you from feeling like you need to open apps just to clear the dot.
The Notification Grouping option lets you choose how notifications appear in bundles. With Automatic turned on, you’ll see notifications grouped logically, such as keeping all notifications from one thread in Messages together. Change this to By App and it will instead show all notifications from the app, regardless of criteria. You can also turn grouping Off.
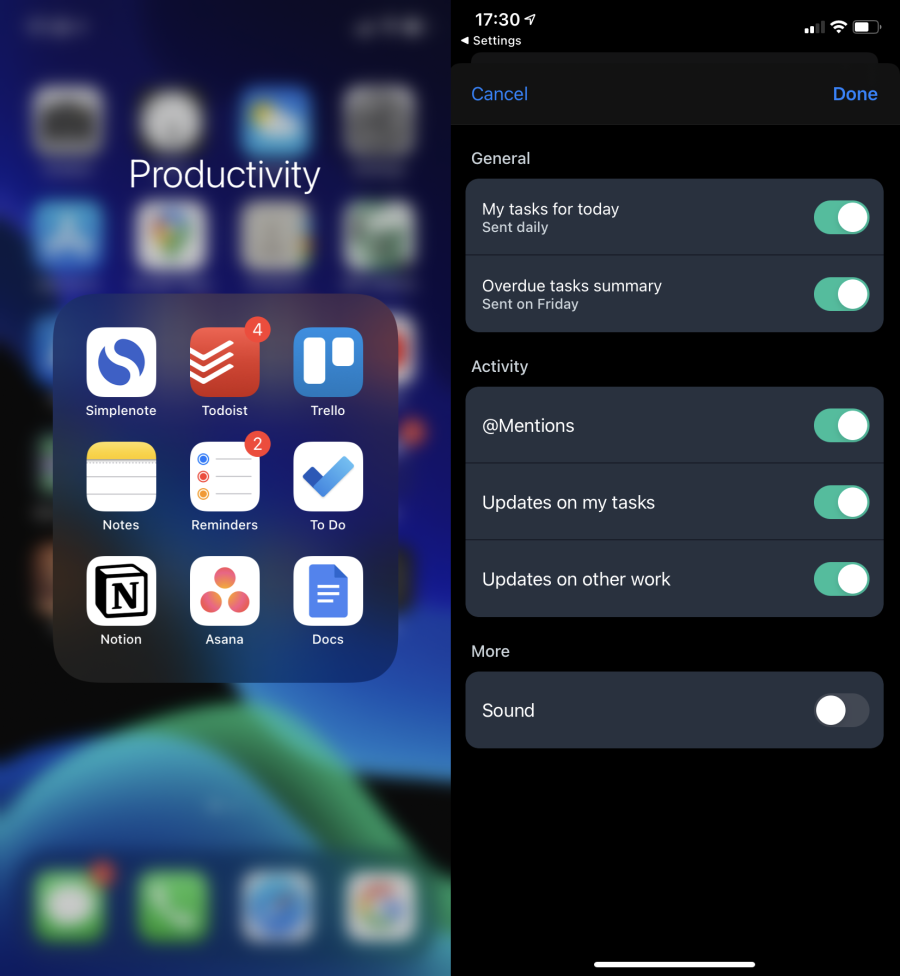
Finally, at the bottom of the screen, you may see [App] Notification Settings. This will take you to the settings page inside the app to further manage its notification options. For example, you might be able to set a Do Not Disturb time for a task management app like Asana, or turn off notifications for automated emails while keeping other alerts on.
Experiment with the options each app provides so you get notified about what you care about, and don’t have to worry about anything else.
Change Notification Options From Alerts
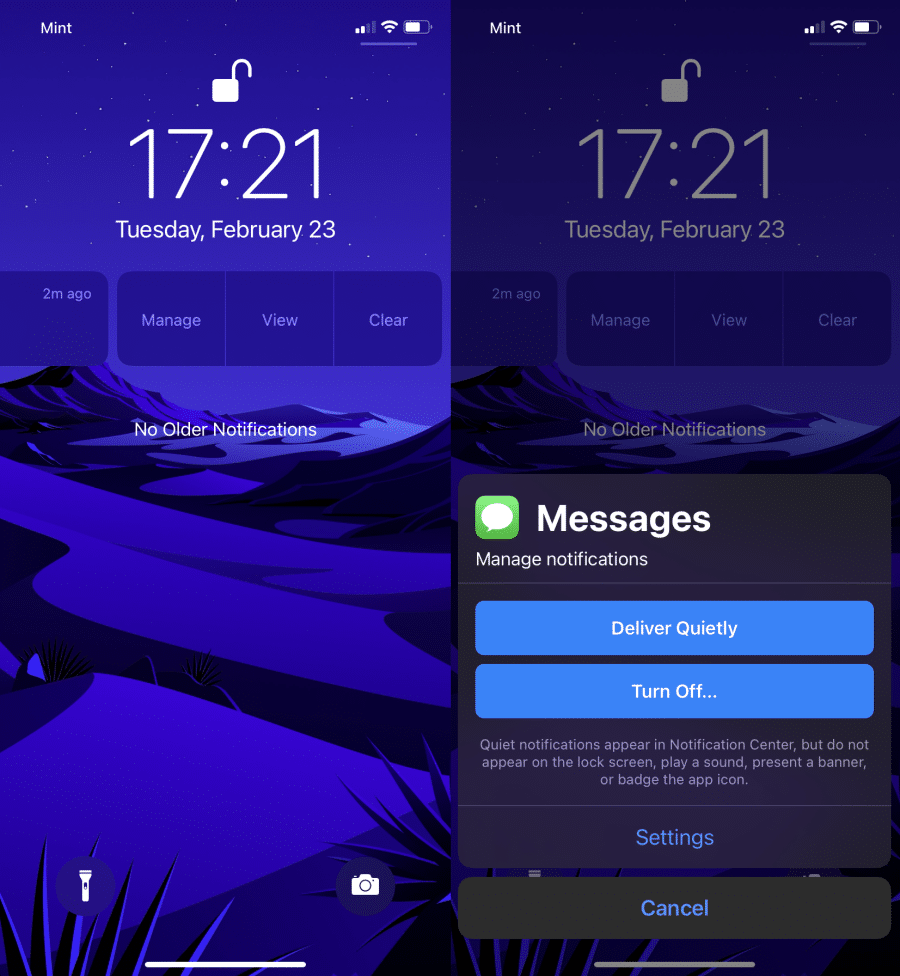
If you get an annoying notification and don’t want to venture into Settings to silence it, you can adjust how iOS delivers alerts from that app right from the Lock screen or Notification Center. To do this, swipe from right to left on the notification to reveal new buttons and choose Manage.
From there, you’ll see two handy options. Choose Turn Off to completely disable notifications for the app, as described above.
Meanwhile, Deliver Quietly will keep alerts from that app in Notification Center, but it won’t make a sound, show banners, appear on your Lock screen, or show a badge on the app’s icon. This is a good way to let yourself respond to notifications on your own time instead of them breaking your concentration.
If you choose this option and later want to re-enable full alerts for an app, open the page again and choose Deliver Prominently.
Take Advantage of Do Not Disturb
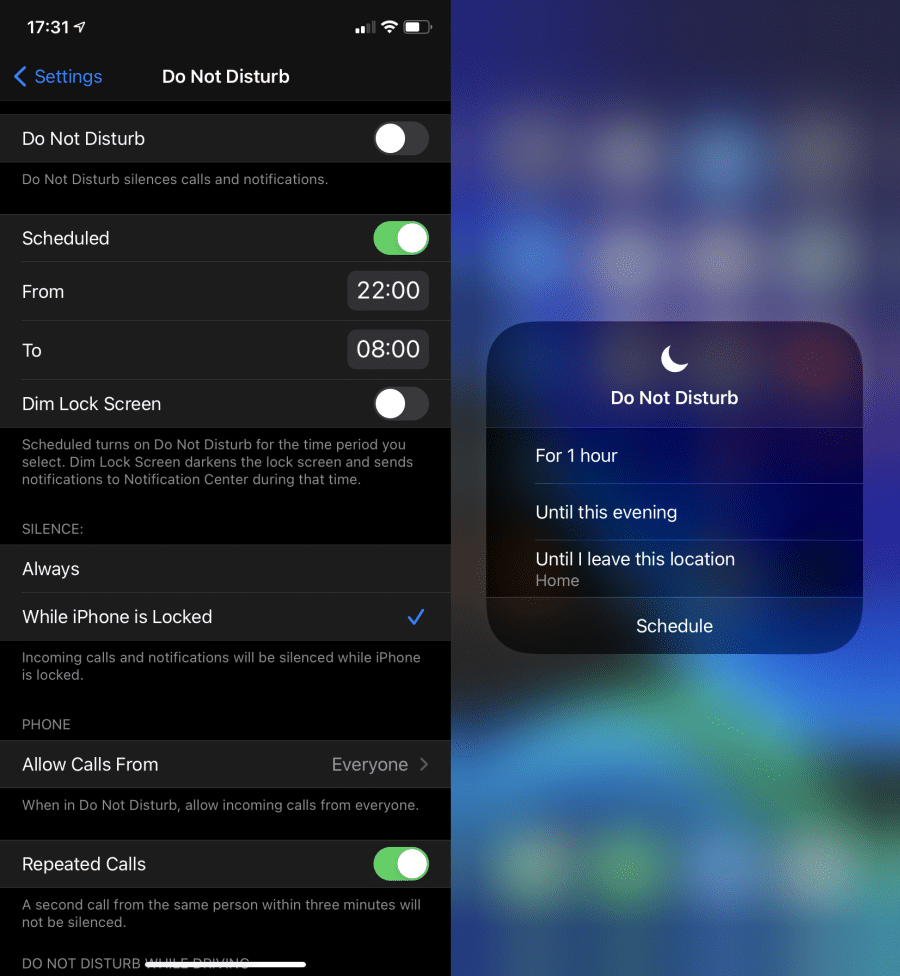
iOS has a great Do Not Disturb feature that prevents alerts from bothering you. You can enable it while you’re sleeping, focusing, in a meeting, and similar. If you haven’t configured Do Not Disturb before, go to Settings > Do Not Disturb.
Here, you can enable the Scheduled slider to have Do Not Disturb come on at a set time every day. You can then change other options, such as who to allow calls from and how Do Not Disturb works while you’re driving.
To manually toggle Do Not Disturb, open Control Center (swipe down from the top-right corner on an iPhone without a Home button, or swipe up from the bottom of the screen on an iPhone with a Home button). Tap the Do Not Disturb icon, which looks like a crescent moon, to turn it on. Press and hold on the icon for more options, such as turning it on For 1 hour or Until I leave this location.
Don’t Let Notifications Take Over
Notifications are a good way to make sure you see important info in a timely manner. But you shouldn’t let them grab your attention for no reason. Spend some time tweaking notifications on a per-app basis and make good use of Do Not Disturb, and notifications won’t interrupt your workflow.
Notifications are just one way that smartphones affect our ability to focus, unfortunately.